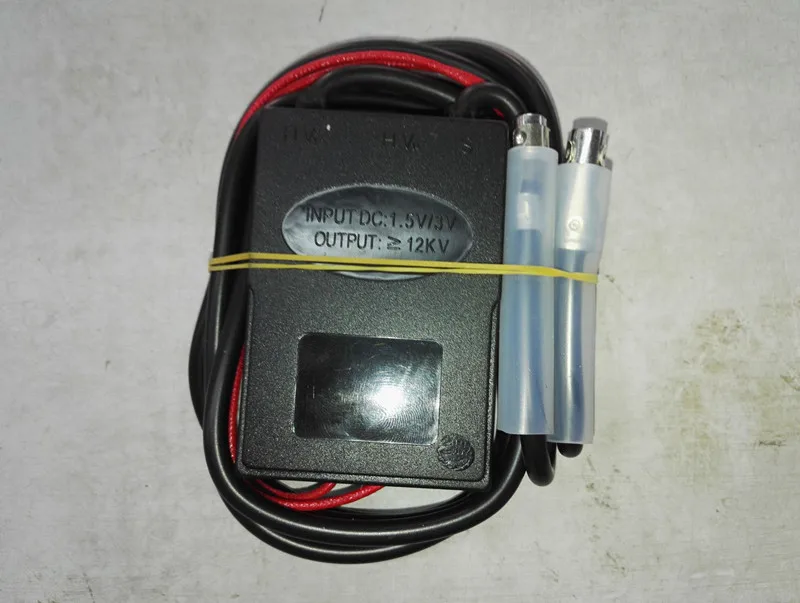
Additional information
| Origin | Mainland China |
|---|---|
| Feature | Stocked |
| Model Number | G9 |
| Material | Plastic |
| Plastic Type | Melamine |
| Type | Kitchen Lighters |
| Certification | CE / EU |
Sklep online tanie

527.50 $
85 in stock
| Origin | Mainland China |
|---|---|
| Feature | Stocked |
| Model Number | G9 |
| Material | Plastic |
| Plastic Type | Melamine |
| Type | Kitchen Lighters |
| Certification | CE / EU |
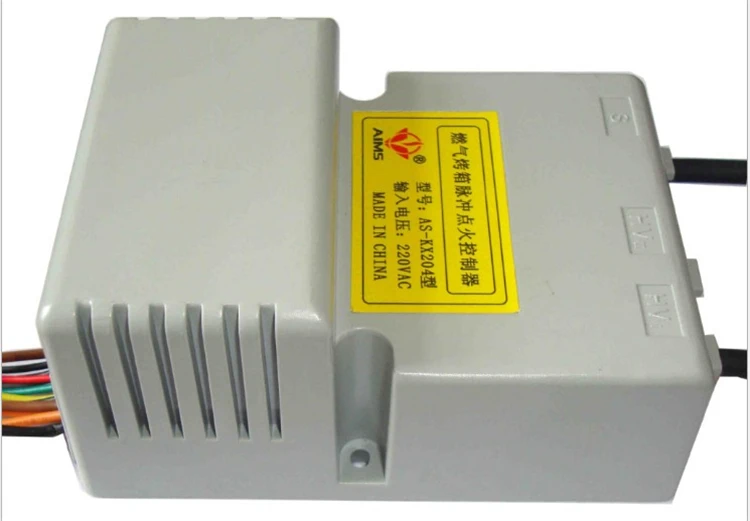
Alcohol based electric heating vaporization controller function description
The controller is a moisture-proof structure of the whole plastic shell, and has its own lead-out line, which is used for electric heating and alcohol-free gasification stove without fan, in addition to conventional heating, temperature measurement, temperature control, inside igniter ignition high-voltage output, electromagnetic pump In addition to the functions such as built-in, there is also a model with its own precision fire regulation, which can realize stepless precision adjustment and start/stop control of the oil pump flow. This function and gear position adjustment realizes no need to switch, fire with heart, start and stop freely. Effect. At the same time, it is equipped with a self-resetting rocker switch or a three-speed self-reset switch the built-in benefits, the joints effectively solve the problem of water inlet, to achieve more convenient gear position control. There are also models with infrared anti-air burning to choose from, easy to achieve considerable energy savings.
The controller is quick and easy to install, stable, adaptable and user-friendly, and cost-effective enough to be a replacement for the alcohol-based fuel gasifier industry. Basic parameters 1, rated working voltage: AC220V 2, normal working voltage range: AC187-242V
3, the service life: the number of actions is not less than 100,000 times 4, heating output power: no more than 2000W
5, ignition high voltage output: built-in igniter, high voltage line lead
6, electromagnetic pump output: AC220V, power is not more than 100W, full power range PWM voltage regulation electromagnetic pump is installed inside the controller 7, temperature probe: K-type thermocouple
8, personality function: one word rocker switch or three-speed self-reset switch built-in Precision firepower adjustment function optional Infrared air defense function optional Wiring instructions
1. External lead plug wire: Connect 220V AC power supply, install leakage circuit breaker and a bipolar switch at the front end of the power supply to play the role of reliable control of total power supply and safety protection.
2. The 4-core waterproof joint is used to connect with the 4-core waterproof joint of the burner. The heating pipeline and the thermocouple wire are connected and docked.
3. There are two black sheathed wires with waterproof joints, which are connected to the infrared emitting head and the receiving head with glass window. The receiving head is a four-core cable, which is connected by the attached special extension cable. The receiving head on the back panel. Setting instructions
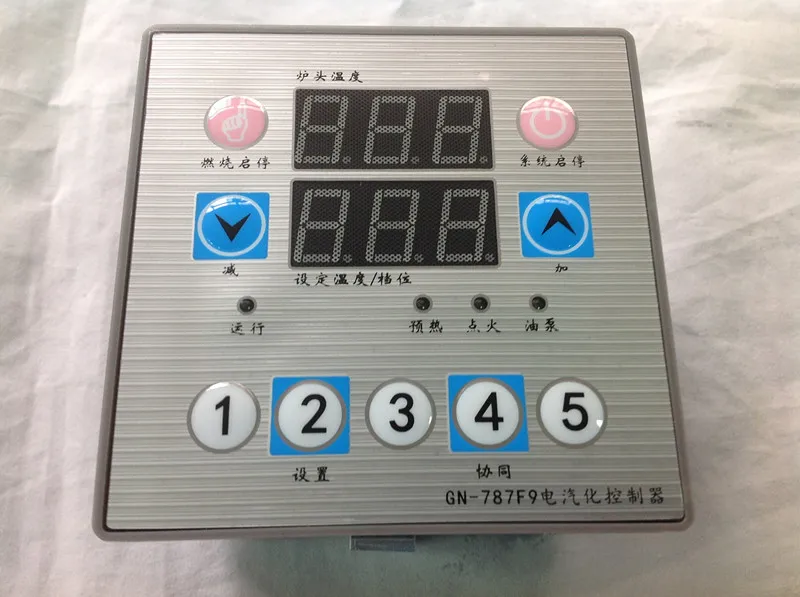
The following instructions are all performed when the controller's settings are in the factory state, the controller is connected to the thermocouple, and the power is turned on. Whether other interfaces are connected or not connected does not affect the setting operation.
After the controller is powered on, all the digital tubes and LED indicators will be lighted up. You can use this opportunity to check whether there are any missing or missing lights. Finally, the digital tube displays OFF, which is the shutdown state. In this state, the setting operation cannot be performed.
Press the start/stop button in the off state, the system enters the heating or standby state, and the digital tube displays the current temperature value and the gear position value respectively. The current temperature value is the temperature measured by the current thermocouple. When the gear position value is not activated, the display is 0. . In this state, you can perform the setting operation:
1. Modify the output power parameter of the electromagnetic pump: press and hold the setting button for about 5 seconds, the red digital tube displays d-1, indicating that the first power output parameter setting menu is entered, and then press the setting button, the green digital tube displays the current output of the gear. The percentage of power, at this time press the increase and decrease buttons, the power output parameters can be adjusted between 0-100.
★ Parameter confirmation save: adjust the parameters, press and hold the setting button, the number starts to flash until the red display SAU, indicating that the parameter is saved successfully, and the system exits the setting state.
★ After adjusting the first gear parameters, if you need to adjust other gear parameters, you can press the setup button again to return to display d-1, and the data is temporarily stored. Press the increase/decrease button to enter d-2, d-3 and other gears in turn, and set the parameters according to the above method. Finally, press and hold the setting button until SAU is displayed, and all parameters are saved before one time.
★If the above operation does not long press the setting button and display SAU, the new parameters will not be officially saved. If there is no operation for a few seconds or the system is started by pressing the start/stop button, the system will still run according to the original parameters.
★ d-1 first file default value 27.0; d-2 second file default value 33.0; d-3 third file default value 39.0; d-4 fourth file default value 46.0; d-5 five file default value 55.0.
2, modify the underlying parameters: display d-5 and then press the minus button, the digital tube shows the SP begins to enter the underlying parameter settings menu, and then press the minus button to display Ao1, SC, HHH, ddH, odH, oPP, SPP, SoP, UPo , SEP, PSF, bEn, dEn and other menus.
1 SP menu is the target temperature value option; default value: 190 ° C; setting range: 60-300 ° C.
★Parameter meaning: heating to this temperature stops preheating.
★ At this time, press the setting button, the digital tube will display the target temperature value, press the increase or decrease button to change the parameter, and the parameter confirmation save method is the same as before. The same applies hereinafter and will be omitted.
★ If you do not press any button for 5 seconds, the setting state will be automatically exited, and the parameter will not be memorized.
2 Ao1 menu is the ignition start temperature value option; default value: 130; setting range: 50-190 °C.
★ Parameter meaning: After reaching this temperature value, it is allowed to start work.
3 SC menu is the error correction value option; default value: 0; setting range: ±20 °C.
★ The meaning of the parameter is: When the current temperature is found to be different from the value measured by the standard thermometer, this value can be set according to the error value to correct the current temperature value to reduce the error.
4 HHH menu is the high temperature protection value option; default value: 450; setting range: 300-500 °C.
★ The meaning of the parameter is: After the temperature is reached, the system automatically protects, and the system forcibly stops the electromagnetic pump output.
5 ddH menu is the delay ignition time option; default value: 0; setting range: 0-20 seconds.
The meaning of the parameter is: After the electromagnetic pump is working, the ignition output will be started after the corresponding time delay.
6 odH menu is the continuous ignition time option; default value: 6; setting range: 1-20 seconds.
The meaning of the parameter is: After the electromagnetic pump is working, the ignition output will stop after the corresponding time.
7 The oPP menu is the boot gear option; the default value is 2; the setting range is 0-5.
The meaning of the parameter is: the output power gear value of the electromagnetic pump at the time of starting.
8 SPP menu is the shutdown gear option; default value: 1; setting range: 0-1.
The meaning of the parameter is: 1 is automatically returned to the second gear after shutdown, and then the second gear is started. 0 is to keep the original gear after the shutdown, and then the original gear is activated.
9 SoP menu is the startup mode option; default value: 1; setting range: 0-1.
The meaning of the parameter is: when the parameter is 0, the system can only be started by pressing the start/stop button or by the precision adjuster; when the parameter is 1, the system adds the function that can be started by pressing the add button, the rocker switch or the right-hand precision adjuster. .
10 The UPo menu is the power-on automatic heating option; default value: 0; setting range: 0-1.
The meaning of the parameter is: 0 is the power does not automatically start heating, or it needs to be manually started after power-on. 1 is the power-on automatic start heating, it automatically starts heating after power-on, no need to press the switch to start.
11 SEP menu is a precision adjusted speed option; default value: 3; setting range: 1-30.
The meaning of the parameter is: the adjustment amount corresponding to the minimum angle of rotation of the external precision regulator can also be understood as the speed adjusted during rotation. The smaller the value, the finer the adjustment and the slower, and vice versa.
12 The PSF menu is the rate option for slowing down and downshifting; default value: 1 second; setting range: 0-3.
The meaning of the parameter is: If the default is 1st gear, it will open to 5th gear immediately after starting, the firepower will be added to 5th gear, or in 5th gear, immediately turn off to 1st gear, then it will be reduced to 1st gear, such as the number. The slower the increase and decrease, the slower, and the faster.
13 bEn menu is the fine-tuning button switch start and stop option; default value: 0; setting range: 0-1.
The meaning of the parameter is: 0 is the pressing start and stop function in the trimming switch, and 1 is on.
14 The dEn menu is a stable fire function option; default value: 1; setting range: 0-1.
The meaning of the parameter is: 0 is the common regulation voltage to control the firepower, can not be fired automatically due to the external grid voltage change, 1 is the steady fire mode, the external grid voltage can change within a certain range, the firepower can work stably.
3, restore the factory settings: the controller is powered off, press and hold the minus button at the same time to turn on the power, display the rEc release button, long press the set button until the display SAU means that the factory settings are successful, all the parameters can be set at this time Both returned to the factory state.
Working process: Description under factory settings
Power on to the OFF state, press the Start / Stop button to enter the preheating state, the heating lamp lights up, the digital tube displays the current temperature and gear position, the output of the heating tube has an output of 220V to start heating, when the temperature reaches 130 °C, the status light Start flashing, the prompt can start the work manually, press the Start / Stop button, the status light turns to steady after the start, the ignition and electromagnetic pump vaporization start to have output and the corresponding indicator lights, after 6 seconds the ignition output stops. The indicator light goes out and enters the burning state. At this time, the output of the heating tube still has an output, and the heating lamp is still lit until the current temperature reaches the desired target temperature to stop the heating output and extinguish the heating lamp.
After the current temperature reaches the target temperature, if the operation is not started by pressing the “Start/Stop” button, the system enters the thermal insulation working state, and the heating and heating is automatically performed. The temperature of the burner is always maintained near the target temperature, ready to start working.
Firepower adjustment method: 1 Press the “increase or decrease” button during the combustion process, and the firepower will gradually increase and decrease the gear position according to the set value of the gear position. 2 Rotate the fine adjustment knob during the combustion process, the firepower can be continuously and smoothly adjusted.
Stop method: 1 Press the “Start/Stop” button during combustion. 2 Press “fine adjustment knob” during combustion. 3 In the combustion, turn the “fine adjustment knob” counterclockwise to the minimum firepower, and then rotate. 4 In the first state of combustion, press the “minus” button. 5 In the first stage of combustion, operate the rocker switch to downshift.
Power-on method: Press the “Start/Stop” button when the 1 status light is flashing. 2 Press the “fine adjustment knob” when the status light is flashing. 3 Turn the “fine adjustment knob” clockwise when the status light is flashing. 4 Press the Add button while the status light is flashing. 5 When the status light is flashing, operate the rocker switch to increase the gear.
After using the above 12 shutdown and then booting, it is started from the system default gear.
After using the above 345 to shut down and then boot, it is started from the first gear.
Shutdown method: Press and hold the “Start/Stop” button or “fine adjustment knob” for about 3 seconds during the stop or combustion work, and the system will enter the OFF state. Precautions:
★The temperature value does not rise and fall during the heating process, indicating that the polarity of the thermocouple is reversed, and the “LLL” will be displayed later.
★ The thermocouple open circuit will display HHH and the system protection will stop. It needs to be restarted after the fault is removed.
★ The process shows that “E-3” is a heating timeout failure. —— After the furnace starts to heat, the temperature does not reach the target temperature for a certain period of time, and the system automatically stops.
The reason, one: the gear flow setting is too large, generally appears in the maximum gear. The amount of pump oil exceeds the vaporization capacity of the burner. The vaporization removes too much heat, which exceeds the sum of the heat of the flame itself and the electric heating. Therefore, the temperature of the burner will gradually decrease. When the temperature is lower than the target temperature for a certain period of time, the system will automatically protection. Second, the temperature measurement thermocouple is faulty, which causes the temperature to not be measured correctly during the electric heating process, so the heating timeout occurs. In order to prevent loss caused by temperature loss at this time, this protection function is specially installed to minimize the problem of melting of the burner.
★When the starting temperature setting value is too low, the flame is unstable and the yellow flame is caused by insufficient vaporization.
★ If you find that the flame is unstable when you just click it, you can set the ignition to delay 1-2 seconds to start the ignition, so you can avoid the knocking phenomenon at the moment of starting. Especially for models with air defense, it is necessary to set up this frequently because of the frequent start-up. Practice shows that this works well.


| Chcę coś kupić ale szukam informacji jak zamówić... |
| Kupiłem coś ale chcę poznać status zamówienia... |
| Odebrałem paczkę ale mam pytanie lub problem... |
| Chcę dokonać zwrotu i potrzebuję informacji... |
| Droptech Sp. z o.o. droptech.polska@gmail.com |
| ul. Łódzka 118, Piotrków Tryb. Sprzedajemy tylko przez internet |
| NIP: 7712911090 REGON 386758083 |
| Wysyłka bezpośrednio od producenta lub dostawcy |
| DARMOWA WYSYŁKA + ubezpiecznie dostawy + śledzenie przesyłki |
| CAŁKOWITY ZWROT podczas reklamacji |
Reviews
There are no reviews yet.